
Reading Time: 5 minutes
Consul is an important service discovery tool in the world of Devops. This tutorial covers in-depth working knowledge of Consul, its setup and deployment. I recommend you to go through the complete tutorial Hashicorp consul tutorial complete guide.
Table of Contents
What is Consul
Consul is a tool and platform developed by HashiCorp that provides various functionalities for service discovery, configuration management, and distributed networking. It’s designed to help with the challenges of building and managing distributed applications and services in modern infrastructure environments, such as cloud, containerized, and microservices architectures.
Key features of Consul:
- Service Discovery: Consul allows services to register themselves and discover other services dynamically. This is particularly useful in a dynamic and distributed environment where services might be constantly scaling up or down.
- Health Checking: Consul can perform health checks on registered services. If a service becomes unhealthy, Consul can automatically update the service registry and alert administrators.
- Key-Value Store: Consul provides a distributed key-value store that can be used for dynamic configuration management. Services can store and retrieve configuration information from this store.
- Multi-Datacenter Support: Consul supports multi-datacenter setups, allowing you to manage services and configurations across different geographical locations.
- Service Segmentation: Consul allows you to define and enforce network segmentation between services, adding a layer of security to your infrastructure.
- Access Control: Consul provides access control features to ensure that only authorized users and services can access and modify resources.
- Secure Communication: It supports TLS encryption for secure communication between nodes and services.
- Service Mesh Integration: Consul can be integrated with service mesh technologies like HashiCorp’s own “Consul Connect” to handle secure communication between services and enable features like traffic routing and segmentation.
Consul uses a combination of DNS and HTTP APIs to enable service discovery and communication between services. It is often used in conjunction with container orchestration platforms like Kubernetes or infrastructure-as-code tools to manage and maintain complex application architectures.
In summary, Consul is a powerful tool that helps with service discovery, health checking, dynamic configuration, and secure communication in distributed and dynamic application environments.
Hashicorp consul tutorial complete guide
How to install consul on Centos
Download URL
If you do not have any server to install Consul then you can create an EC2 instance on AWS or any cloud or you can install it on your laptop. You can follow the tutorial for spinning up EC2 instances.
Consul Agent in Dev Mode
$ consul agent -dev
$ consul agent -dev --client=0.0.0.0
# Start to use from the local laptop – We can load consul GUI from the laptop
$ consul kv delete demo/
consul kv get --recurse
consul kv get demo
Join client to server
$ consul agent -join 172.29.203.141 -bind 172.29.203.142 -data-dir (Path where info will be stored)
start consul 8300 with host IP bind
$ consul agent -dev --client=0.0.0.0 -bind 172.29.203.141 -- This helps to join consul client to server
$ consul agent -join 172.29.203.141(Consul Server) -bind 172.29.203.79(Consul client) -data-dir /root/consul
$ consul members
Consul Remote Execution
$ consul exec ping google.com
$ consul exec ping -c1 google.com
Remote execution is disabled by default, You will need to explicitly enable it at node level to make use of it.
$ consul agent -hcl 'disable_remote_exec=false'
$ consul agent -join 172.29.203.141 -bind 172.29.203.79 -data-dir /root/consul -hcl 'disable_remote_exec=false'
$ consul exec df -hP /
Overview of Consul Configuration Directory
Config Directory
$ consul agent -config-dir=/etc/consul.d/consul-new-config
Create a new config directory
$ mkdir /etc/consul.d/consul-new-config
$ cd /etc/consul.d/consul-new-config
$ vi consul.hcl
Add below content
data_dir = “/etc/consul.d/consul-new-config”
start_join = [“172.29.203.141”]
bind_addr = “172.29.203.79”
disable_remote_exec = false
$ consul agent -config-dir=/etc/consul.d/consul-new-config
Agent Leave behavior in Consul
Graceful Exit (It notifies the cluster and then leaves) and Force Removal (When Server Simply fails)
Control+c – Does graceful exit – It will show as filed when you run consul members
$ killall -s 2 consul
You can also use netstat -tlnp and look for consul PID and use kill -9 PID to kill the consul process.
$ killall -s 9 consul
Consul Server Mode
We hope you are able to use Cosul Dev mode by following steps on Hashicorp consul tutorial complete guide. Incase if you have any error on Hashicorp consul tutorial complete guide, Please write to us.
Important Flags
Server = If you want to start agent I server Mode
-bootstrap-expect = This tells the consul server how many servers the data center should have in total
-node = Each node in a data center must have a unique name, by default, the consul uses the server hostname of the machine however you can manually override it and set it to agent-one
-bind and -data-dir = Address agent will listen & Storing state data
Config-dir = This flag tells the consul where to look for its configuration standard location is /etc/consul.d
Start consul in server mode :
$ consul agent -server -bootstrap-expect=1 -node=consul-server -bind 172.29.203.141 -client=0.0.0.0 -data-dir=/root/consul -ui=true
Systemctl & Consul
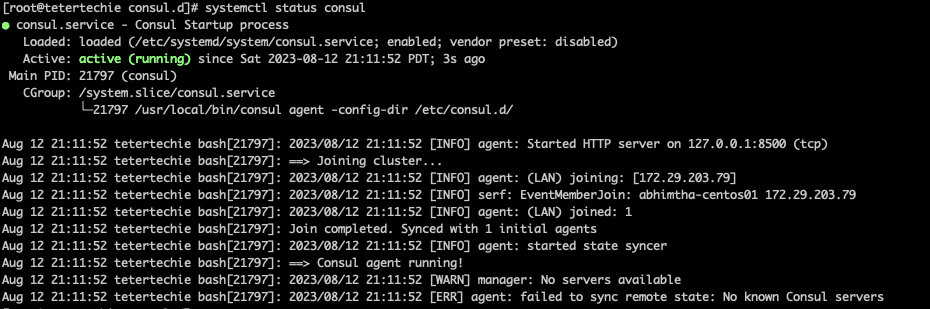
$ systemctl status consul
$ cd /usr/lib/systemd/system
$ cd /etc/consul.d
$ mv config.json config.json.bak
$ cp /etc/consul.d/consul-new-config/consul.hcl .
root@tetertechie consul.d]# ls -l
total 8
-rw-r–r–. 1 root root 525 May 16 20:22 config.json.bak
-rw-r–r–. 1 root root 108 Aug 12 20:44 consul.hcl
useradd -m consul
chown consul:consul consul.hcl
journalctl -u consul
systemctl start consul
systemctl enable consul.service
Overview of Service Discovery
Implementing Service Discovery
Registering Service
Finding Service
Monitoring Service
Write Service Definition file
Consul Server
[root@tetertechie consul-new-config]# cat /etc/consul.d/consul-new-config/consul.hcl
data_dir = “/etc/consul.d/consul-new-config”
client_addr = “0.0.0.0”
bind_addr = “172.29.203.141”
bootstrap_expect = 1
node_name = “consul-server”
ui = true
server = true
[root@tetertechie consul-new-config]#
root@tetertechie consul-new-config]# pwd
/etc/consul.d/consul-new-config
[root@tetertechie consul-new-config]#
Consul client
[root@testertechie-client consul-new-config]# cat consul.hcl
data_dir = “/etc/consul.d/consul-new-config”
start_join = [“172.29.203.141”]
bind_addr = “172.29.203.79”
disable_remote_exec = false
chown -R consul.consul /etc/consul.d/consul-new-config
systemctl restart consul
systemctl status consul

How to Register Service
On client
[root@testertechie-client consul-new-config]# cat web.json{
"Service": {
"name": "web",
"port": 80
}
}
[root@testertechie-client consul-new-config]#
consul validate /etc/consul.d/consul-new-config
consul reload
Find service
yum install bind-utils
dig @localhost -p 8600 web.service.consul SRV
curl 172.29.203.79:80
root@testertechie-client consul-new-config]# cat /etc/systemd/system/consul.service
[Unit]
Description="HarshiCorp Consul- A Service mesh solution"
Documentation=https://www.consul.io/
Requires=network-online.target
After=network-online.target
ConditionFileNotEmpty=/etc/consul.d/consul.hcl

[Service]
User=consul
Group=consul
ExecStart=/usr/local/bin/consul agent -config-dir=/etc/consul.d/consul-new-config/
ExecReload=/usr/local/bin/consul reload
ExecStop=/usr/local/bin/consul leave
KillMode=process
Restart=on-failure
LimitNOFILE=65536
[root@testertechie-client consul-new-config]#
$ systemctl daemon-reload
[root@testertechie-client consul-new-config]# $ cat web.json
{
    "Service": {
        "name": "web",
        "port": 80,
        "check": {
         "args": [
            "curl",
            "127.0.0.1"


         ],
         "interval": "10s"
        }
    }
}
[root@testertechie-client consul-new-config]#
$ systemctl restart consul
$ systemctl status consul
$ curl localhost:80
$ sudo yum install epel-release
$ sudo yum install nginx
$ systemctl enable nginx
$ systemctl start nginx
$ curl localhost:80
dig @172.29.203.141 -p 8600 web.service.consul
Dynamic Application Configuration
Consul simple Key-value store, useful for storing service configuration or other metadata
List all keys
consul kv get --recurse
Create KV from cli
consul kv put max_memory 512
consul kv delete course
Watches Functionality in Consul
Whenever a key is updated then watch functionality gets called then the external handler is detected
consul kv put max_mem
consul watch -type=key -key=max_mem
echo null |base64 -d
[root@testertechie-client consul-new-config]# cat myscript.shwhile read watch
do
echo $watch
done
[root@testertechie-client consul-new-config]#
chmod +x myscript.sh
consul watch -type=key -key=max_mem ./myscript.sh
Change the value of max_mem from GUI and look for watch changes
consul watch -type=key -key=max_mem
consul kv put max_mem1 204MB
The watch can support below features:
1. key,
2. key prefix
3. services.
4. Nodes,
4. checks.
5. Events
How to Check Critical Checks
consul watch -type checks -state critical
[root@testertechie-client consul-new-config]# systemctl stop nginx
[root@testertechie-client consul-new-config]# consul watch -type checks -state critical
[
{
“Node”: “testertechie-client”,
“CheckID”: “service:web”,
“Name”: “Service ‘web’ check”,
“Status”: “critical”,
“Notes”: “”,
“Output”: ” % Total % Received % Xferd Average Speed Time Time Time Current\n Dload Upload Total Spent Left Speed\n\r 0 0 0 0 0 0 0 0 –:–:– –:–:– –:–:– 0curl: (7) Failed connect to 127.0.0.1:80; Connection refused\n”,
“ServiceID”: “web”,
“ServiceName”: “web”,
“ServiceTags”: [],
“Definition”: {
“Interval”: “0s”,
“Timeout”: “0s”,
“DeregisterCriticalServiceAfter”: “0s”,
“HTTP”: “”,
“Header”: null,
“Method”: “”,
“TLSSkipVerify”: false,
“TCP”: “”
},
“CreateIndex”: 1233,
“ModifyIndex”: 1826
}
]
[root@testertechie-client consul-new-config]#
Note: You can integrate this with the watch with email or Slack.
We hope you are enjoying this tutorial Hashicorp consul tutorial complete guide.
Consul Template
The consul template queries a consul instance and update any number of the specified template on the file system
On Server
Install wget$ sudo yum install wget -y
wget https://releases.hashicorp.com/consul-template/0.33.0/consul-template_0.33.0_linux_amd64.zip
Unzip consul-template_0.33.0_linux_amd64.zip
mv consul-template /usr/local/bin/
rm consul-template_0.33.0_linux_amd64.zip